
Avid gardeners and aspiring green thumbs alike understand the thrill of watching a seedling emerge from the soil, stretching its tiny leaves towards the sun. But what happens when your seeds don’t sprout? Disappointment and frustration can quickly replace eager anticipation.
Of course, the reasons for poor germination can vary widely — from unsuitable growing conditions and poor soil quality to planting seeds too deeply or too close together. But often, the culprit lies in the seeds themselves: they may have lost their vigor over time, been damaged during storage, or simply be of low quality.
Enter seed germination testing — a quick and easy method to determine if your seeds are viable before planting them in the ground. This not only increases your chances of success but also helps you avoid wasting valuable time, energy, and resources on seeds that won’t sprout.
Read on! With the knowledge and techniques presented in this article, you’ll be well-equipped to optimize your garden‘s productivity and enjoy the satisfaction of growing healthy plants from carefully selected seeds.
Why Do You Need to Test Seed Viability?
Seed viability refers to the ability of a seed to germinate and grow into a healthy, productive plant. Viability is an indication of the seed’s overall health, vigor, and potential to develop into a thriving plant under suitable growing conditions.
It is influenced by various factors such as:
- the seed’s age,
- storage conditions,
- genetic traits,
- exposure to moisture or extreme temperatures.
A viable seed contains a living embryo with stored nutrients and enough energy to initiate the germination process. However, seeds, like all living things, have a shelf life. As seeds age or are subjected to unfavorable conditions, their viability decreases, leading to lower germination rates and weaker seedlings.
Testing seed viability before planting helps gardeners ensure that they are sowing seeds with a high probability of successful germination, ultimately resulting in healthy plants and bountiful harvests. It allows you to ensure that your efforts in the garden aren’t wasted on duds, not only saving you time but also freeing up valuable space in your garden beds for seeds with greater potential.
Assessing seed viability can also help you identify any potential issues with your seed storage methods. If a significant portion of your stored seeds fails the germination test, it may be an indication that they were exposed to unfavorable conditions during storage. This insight allows you to make necessary adjustments to your storage practices, ultimately extending the life and quality of your seeds.
Moreover, knowing which seeds are still viable allows you to make informed decisions about which ones to purchase anew or when it’s time to start fresh with a different variety. This, in turn, can save you money and improve the overall health of your garden by ensuring that only vigorous and robust seedlings make their way into the soil.
Testing seed viability is particularly crucial for heirloom varieties and rare or expensive seeds. Since these seeds often come at a premium price or may be difficult to replace, confirming their viability before planting can prevent disappointment and conserve valuable resources.
Furthermore, conducting germination tests on seeds collected from your own plants can provide valuable information on the genetic traits passed down from parent plants. This helps you select seeds from plants with desirable characteristics — such as disease resistance, high yield, or exceptional flavor — and propagate those traits in future generations of plants.
As you can see, testing seed viability is a practical and indispensable tool for gardeners of all levels. It not only ensures that your time and effort are well-spent but also contributes to the long-term success and sustainability of your garden by promoting the cultivation of strong, healthy plants.
Paper Towel Seed Germination Test
The paper towel seed germination test is a popular method among gardeners because it’s simple, inexpensive, and requires minimal supplies. This test allows you to check seed viability without the need for soil, pots, or other planting materials.
To perform this test, follow these steps:
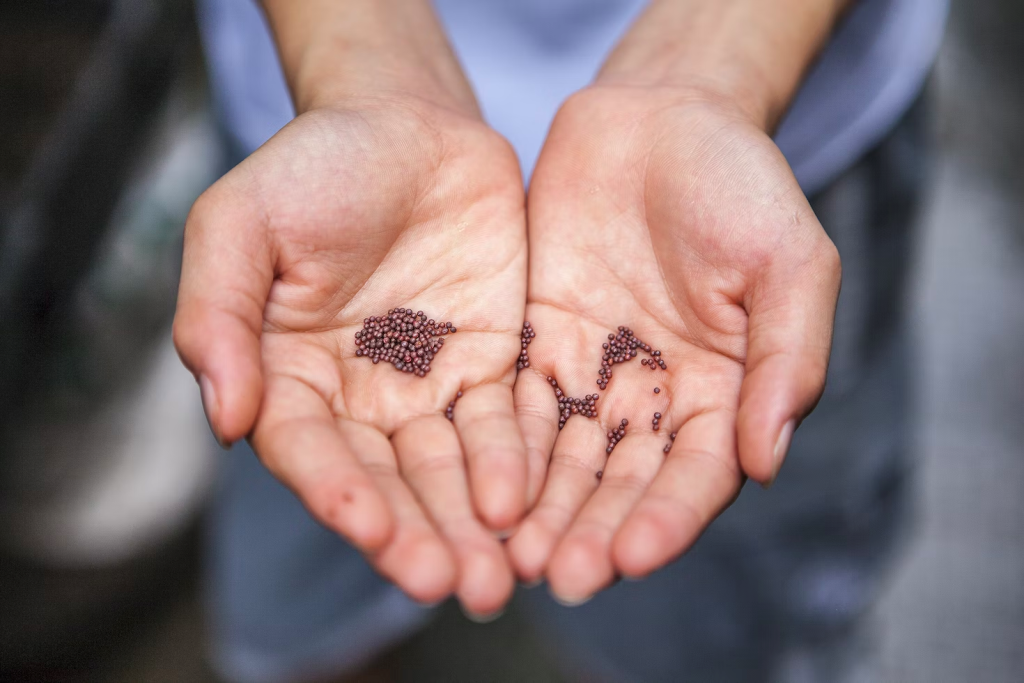
- To begin, gather your supplies — seeds, a few sheets of paper towels, a plastic bag or a container with a lid or a ziplock bag, a marker for labeling, and a spray bottle filled with water.
- Using the spray bottle, lightly moisten the paper towel so it’s damp but not soaking wet. The goal is to provide enough moisture for the seeds to germinate without creating an overly wet environment that could encourage mold growth.
- Arrange a few seeds (typically 10-20, depending on the size) on half of the paper towel, spacing them out evenly to prevent overcrowding. If you’re testing several varieties of seeds or want to compare germination rates between different batches, use separate paper towels and containers for each set of seeds.
- Fold the other half over the seeds, gently pressing down to ensure good contact between the seeds and the moistened towel to create a “sandwich.” Place this paper towel “sandwich” in the plastic bag or container and seal it to prevent the moisture from escaping.
- Label the bag with the seed variety, the date you started the test, and the batch number (if applicable).
- Store the sealed container in a warm location, ideally between 65-75°F, away from direct sunlight. The top of a refrigerator, a seedling heat mat, or an airing cupboard can provide the necessary warmth for most seeds to germinate.
And that’s it! After that, you only need to check on your seeds once a day — we explain why and how below.
Germination Rates
Understanding germination rates helps you plan your planting strategy and maximize your garden’s productivity.
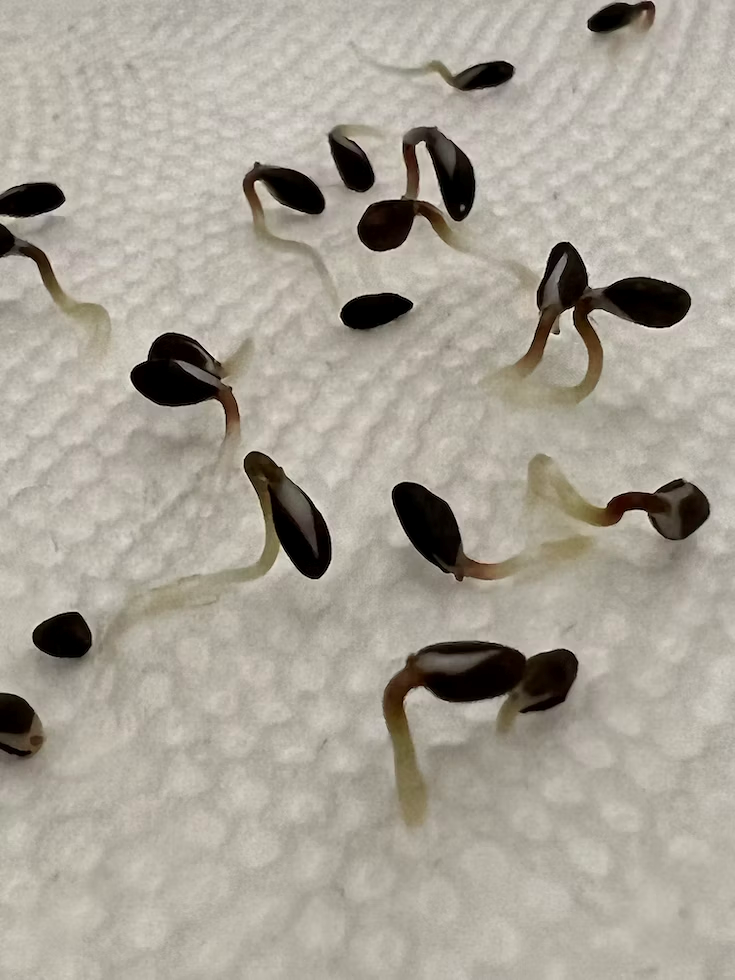
After a few days, check on your seeds by carefully unfolding the paper towel. You should see tiny roots or shoots emerging from some of them. This is a sign that they’re viable and ready to be planted!
Continue checking daily for up to two weeks, keeping track of how many seeds have germinated.
To calculate the germination rate, divide the number of sprouted seeds by the total number you started with, then multiply by 100 to get a percentage.
For example, if 15 out of 20 seeds have germinated, your germination rate is 75%.
This information can help you determine how many seeds to plant in your garden to achieve the desired number of plants.
For instance, a high germination rate (80-100%) indicates that your seeds are fresh and vigorous, while a lower germination rate (50-79%) suggests that they may be older or have been stored under less-than-ideal conditions.
Seeds with a germination rate below 50% are generally considered poor quality and may not be worth planting.
Knowing your seeds’ germination rate can help you determine how many seeds to plant in your garden to achieve the desired number of plants.
To illustrate the example:
- if you have a high germination rate, you can sow the rest of the seeds from the same package at their recommended spacing,
- if your germination rate is lower, consider sowing more seeds per hole or closer together to compensate for the reduced viability.
If you find that your seeds consistently have low germination rates, it may be time to reassess your seed storage practices or consider replacing them with a different type or a different supplier.
Ensure that your seeds are stored in a cool, dry, and dark location, away from temperature fluctuations and humidity, to preserve their viability for as long as possible.
Using Sprouted Seeds

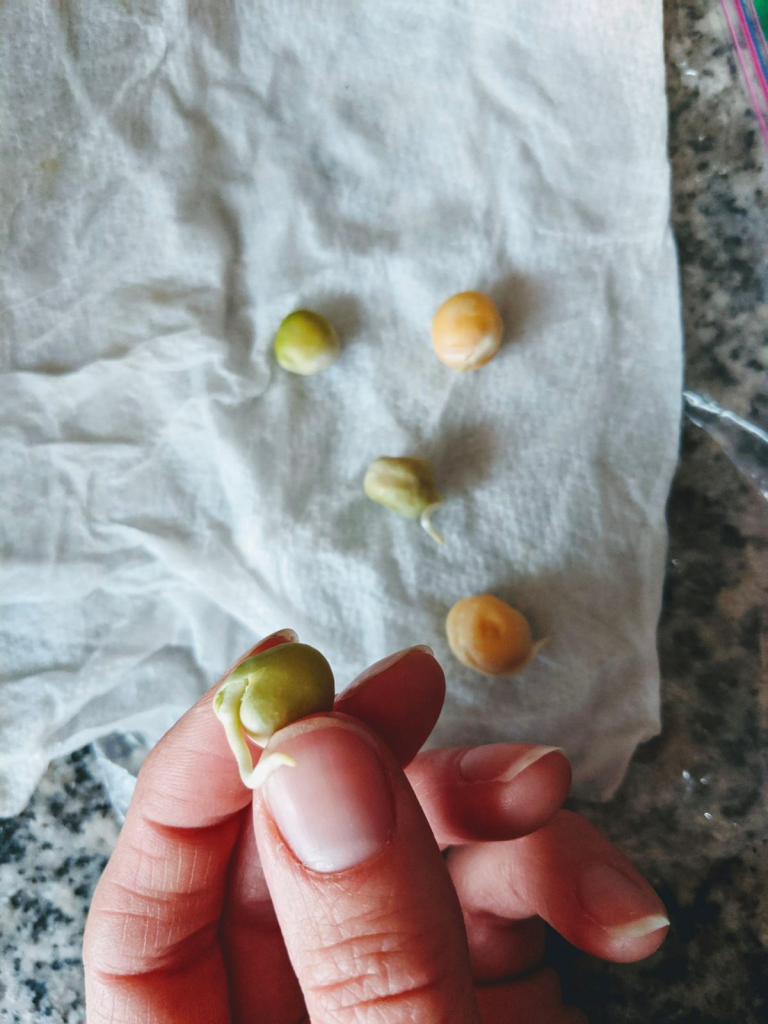
Once your seeds have sprouted, it’s time to transfer them to soil or another growing medium. Carefully remove each seedling from the paper towel, taking care not to damage the delicate roots. Plant them at the recommended depth for their specific variety, gently pressing the soil around them to ensure good contact.
Keep in mind that sprouted seeds are more vulnerable than unsprouted ones; they require special care during transplanting and watering, as well as protection from temperature fluctuations and pests.
However, that’s not it — there are more ways to use sprouted seeds:

- Eating sprouted seeds. Many seeds can be consumed once they have sprouted, offering a range of health benefits and unique flavors. Sprouted seeds are rich in vitamins, minerals, enzymes, and proteins, making them a nutritious addition to salads, sandwiches, smoothies, and other dishes.
Commonly consumed sprouted seeds include broccoli, radish, sunflower, and various legumes like lentils and chickpeas. To eat sprouted seeds, simply rinse them gently in cool water and consume immediately or store them in the refrigerator for a few days.
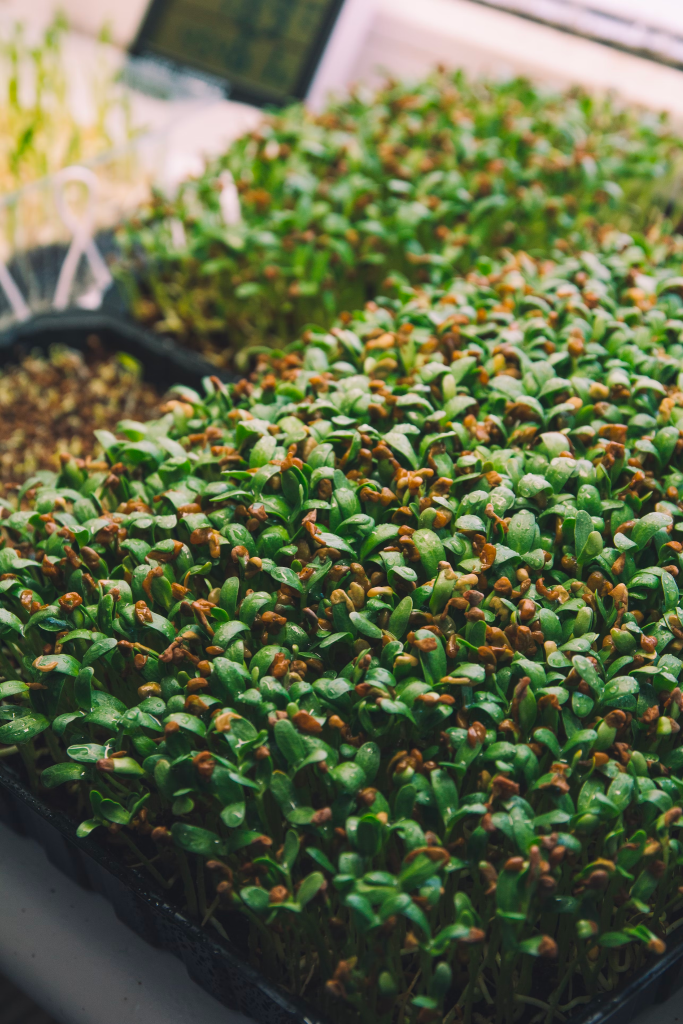
- Growing microgreens. Another option for using sprouted seeds is to grow them into microgreens — the young, tender shoots of plants harvested shortly after germination. Microgreens can be grown in shallow trays filled with soil or another growing medium, and they typically reach harvest size within 7-14 days.
They offer a concentrated source of nutrients and flavors, making them an excellent addition to salads, sandwiches, and garnishes.
Whether you choose to transplant your sprouted seeds into your garden or consume them as a healthy addition to your meals, make sure you’re making the most out of your germination testing instead of simply disposing of them.
Conclusion
Performing a simple seed germination test can save you time, money, and heartache by ensuring that only viable seeds make their way into your garden. By understanding germination rates and properly caring for sprouted seeds, you can optimize your garden’s productivity and enjoy the satisfaction of growing plants from seed to harvest.
o, gather your supplies, test your seeds, and watch your garden flourish!
Was it helpful?

Enamored with the world of golf Jack pursued a degree in Golf Course Management at THE Ohio State University. This career path allowed him to work on some of the highest profile golf courses in the country! Due to the pandemic, Jack began Inside The Yard as a side hustle that quickly became his main hustle. Since starting the company, Jack has relocated to a homestead in Central Arkansas where he and his wife raise cattle and two little girls.